
Use the Approval Pane to submit approval actions, and filter the objects in your approval according to whether or not you can interact with them.
Approve Objects
To approve objects, follow these steps:
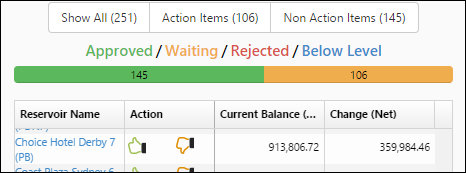
- Locate the object you wish to approve or reject in the approval table.
- Click on the Approve or Reject button that corresponds with the object. In this example, the Choice Hotel Derby 7 reservoir will be approved.
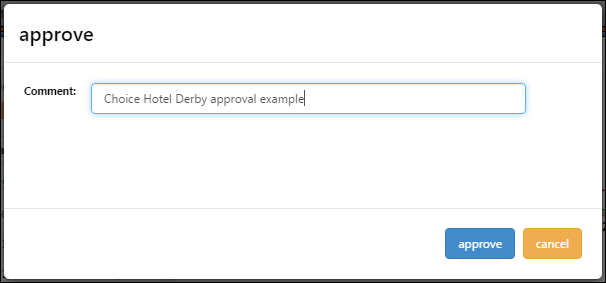
- After clicking an action button (approve in this example), a field will be displayed where you can enter a comment associated with your action. After you enter your comment, click the submit button (Approve) in this example.
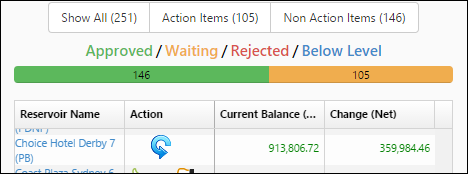
- The Approve and Reject buttons will be replaced by the Retract button. The object is now classified as a Non Action Item. The approval status bar will update along with the Action Items and Non Action Items buttons.
Click image to expand or minimize.
Multi-Object Approval
It is possible to complete an approval process by approving each base-level object included in the approval one after another. However, approving more than one object at a time is possible, and will save you substantial amounts of time. You can approve multiple objects by using an attribute filter that contains groupings of objects (e.g. selecting fields that contain numerous reservoirs), and then approving objects at that attribute level. In this example, the 9 reservoirs belonging to a single field will be approved in one step.
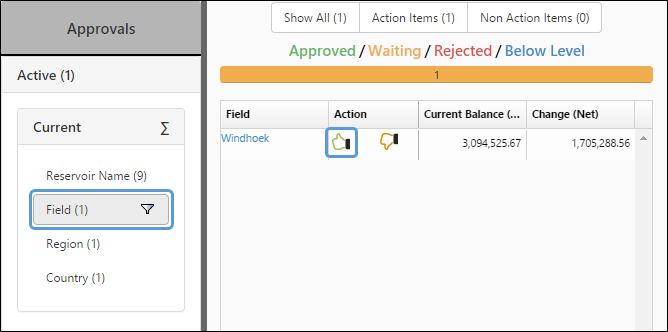
- Select an attribute filter containing groupings of objects. In the example below, the Field filter was used.
- Locate the object you wish to approve, and click the Approve icon.
- Enter your approval comment and click the Approve button. All of the objects within the field selected were approved (visible below).
Click image to expand or minimize.
Click image to expand or minimize.
Reject Objects
Rejecting objects is just as easy as approving them. After clicking the Reject button, enter a comment associated with your rejection, and then click the Reject button. Once an object is rejected, it is pushed down to a lower approval level (it becomes an action item for users in a lower level of the approval definition). Only after members of the lower approval level have re-approved the object, will it be reclassified as an action item for the higher approval level. The screen shot below depicts how rejected reservoirs will appear in the approval pane. As you can see, rejected items appear like any other action item, but values are displayed in red.

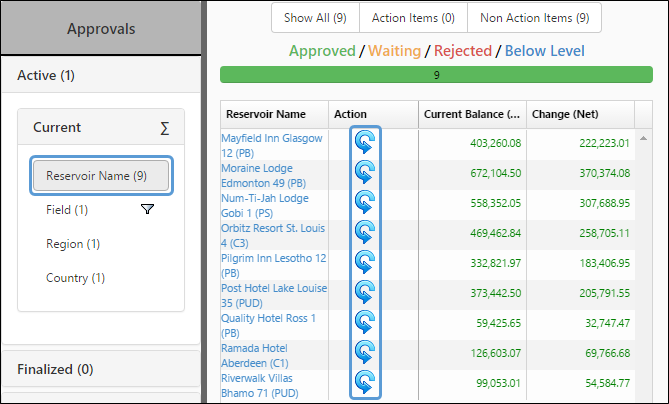
Action Filters in the Approval Pane
Use the three buttons at the top of the approval pane to sort the objects displayed in the table according to how they can or cannot be approved.
 | Click the Show All button to display all of the objects included in the version associated with your approval. |
 | Click the Action Items button to reduce the list of objects included in the table to those that are ready for approval or rejection. |
 | Click the Non Action Items button to display all of the objects that you cannot approve or reject. Sorting the table for Non Action Items will also display those objects that you have already approved or rejected, and are currently eligible for retraction. |
Approval Notifications
Special notifications will appear when approvals are created, deleted, approved, or rejected by other users while you are using the Approvals page. When changes of this sort occur, an icon will appear near the top of the filters pane.
Clicking the messages icon will reveal detailed information about changes in your approvals.

Approval Audit Trail
You can view a list of all of the actions that have been taken in your approval using the approval audit trail feature. See The Report Pane for more information.